One Room Challenge: Main Bedroom

When Jono and I first moved in, our main bedroom had not been updated much since the condo was built in the 70’s. The room had bright green paint on the walls and old carpet throughout, but at the time we couldn’t afford to do much with the space. We ended up painting the walls a bright white and tried to give it a facelift with some of our own furniture and decor. This worked for us for about 3 years until we saved up enough to give it a much bigger overhaul. We really wanted to turn our bedroom into a more inviting space and ultimately a retreat that we could escape to at the end of the day!
So because we enjoy a little fire under our butts, what better way to give us some motivation than to try to get all the work done in an 8-week timeline? For the third time, we signed up to do the One Room Challenge, giving this room a substantial makeover over the 8 weeks – we definitely took on more than we realized at the time!
We decided pretty early on that if we were going to make changes in this space we might as well invest in new flooring for the main bedroom and our guest room. The carpet we had originally came with the house and we were ready to get rid of it and brighten up the room with oak-colored floors. After reviewing a variety of flooring options, we landed on a Luxury Vinyl Planking from Flooret in Soho Base. We chose LVP because of its durability (especially having three dogs that ruin everything!), ease of install, and lower price point. The floors were about $2.75 a square foot and we ordered enough to complete both the main bedroom and our guest bedroom.
Before the floors arrived, we did a lot of prep work by removing the old carpet, taking out all the staples, and removing the baseboards. This process took us a few days but once the floors got here we were ready for install! We learned a lot about the install process – especially what not to do. We regret not doing more research beforehand because it would have saved us a lot of time in the end so we definitely recommend watching our highlights and the reels on our page on how we installed it or reviewing tutorials online.
To install the floors, we used our miter saw and first sorted through a few boxes to vary the pattern of the floors. We installed our first row and then we learned that the last cut piece of that row could be used as the first piece in your next row. We repeated this over and over until we did not have a substantial-sized piece leftover. This worked really well for us to vary our pattern and we continued it through the whole room. The key to install is making sure to come in at an angle to get both pieces to lock, and then you’ll want to tap the pieces into place with a mallet and tool (we ordered ours installation kit through Amazon). We also updated our baseboards and added new trim to all the doors to finish it off!
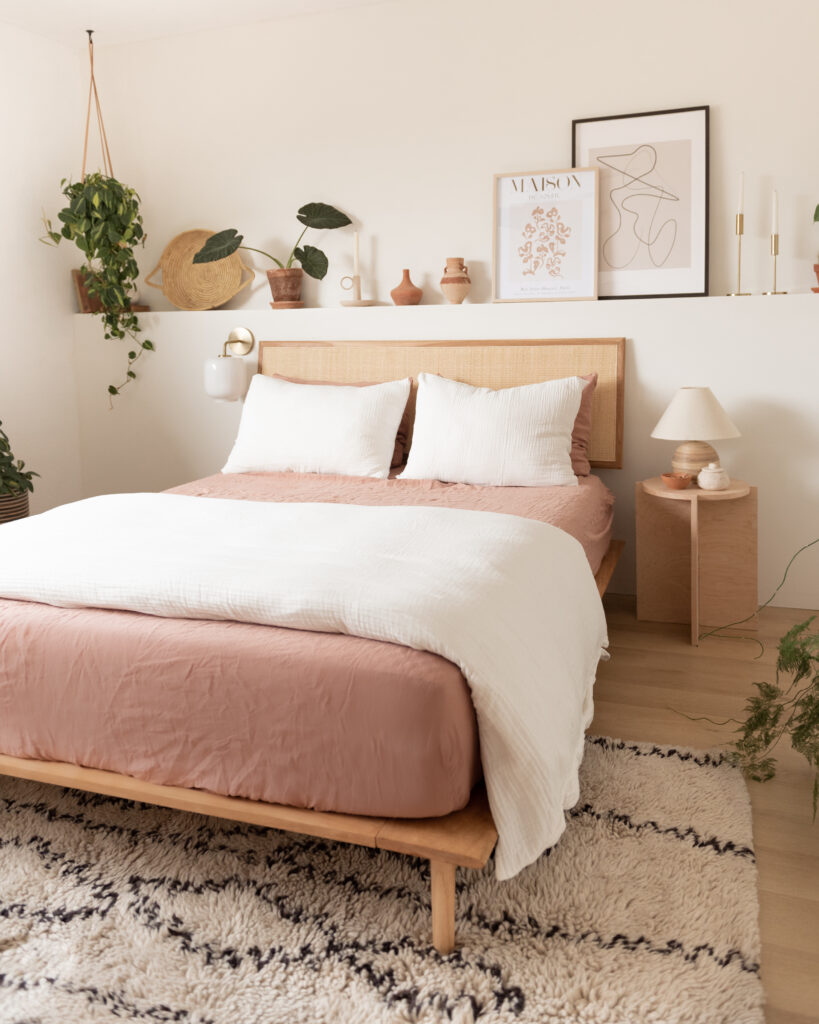
After the floors were complete, we focused on building out a wall shelf that would be behind our bed and be a place for our plants, frames, and other decor pieces. We framed out our wall, drywalled, mudded, and then painted it a soft white. It really gave the room a focal point and did not take away a lot of space within the room.
For the furniture pieces in the room, we gave our mid-century modern dresser a makeover by stripping the paint, sanding it down, adding new veneer to the top, and hand-making our own drawer pulls. For the bed, we took birch wood and built a base for our new bed then added a caned headboard that we also DIY’d. To finish it off we built our own nightstand and added a new sconce, lamps, and a fan that made the room feel more modern and warm.
We’d love to know what you think of the finished room and we’re excited we get to enjoy our new retreat!
 Patio Revamp